Dining Chair Revamp

I spent the three-day weekend relaxing with the fam so we’ll take this short week off from the reveal of the final rooms in the house.  But I wanted to share a few of the random projects that I never got a chance to discuss.

Last year, I decided I wanted to finally replace our dining room chairs that we’ve had since we bought our first table in the San Francisco house.  The chairs are perfectly decent Ikea upholstered chairs but I thought it was time to come up with something different/better/unique.

I came across this image from Nate Berkus and was immediately smitten.

Inspiration
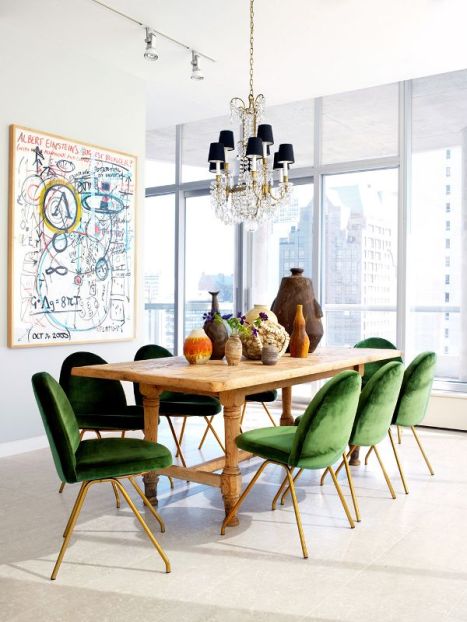
Those chairs, that view, the artwork…love it.  Anyway, my room doesn’t look anything like that and I have an open dining room that looks directly into the kitchen (and is sorta next to it).  So I decided to do a green velvet dining chair but I needed it to play nicely with the navy blue kitchen cabinets and the chandelier I had already installed.

I couldn’t find any chairs that I liked (and could afford) so I started a search for vintage chairs that I could recover.  After a few weeks searching, I found these “beauties” on ebay and had them sent across the country.

Chair-Before2 Chair-Before3 Chair-Before6 Chair-Before4
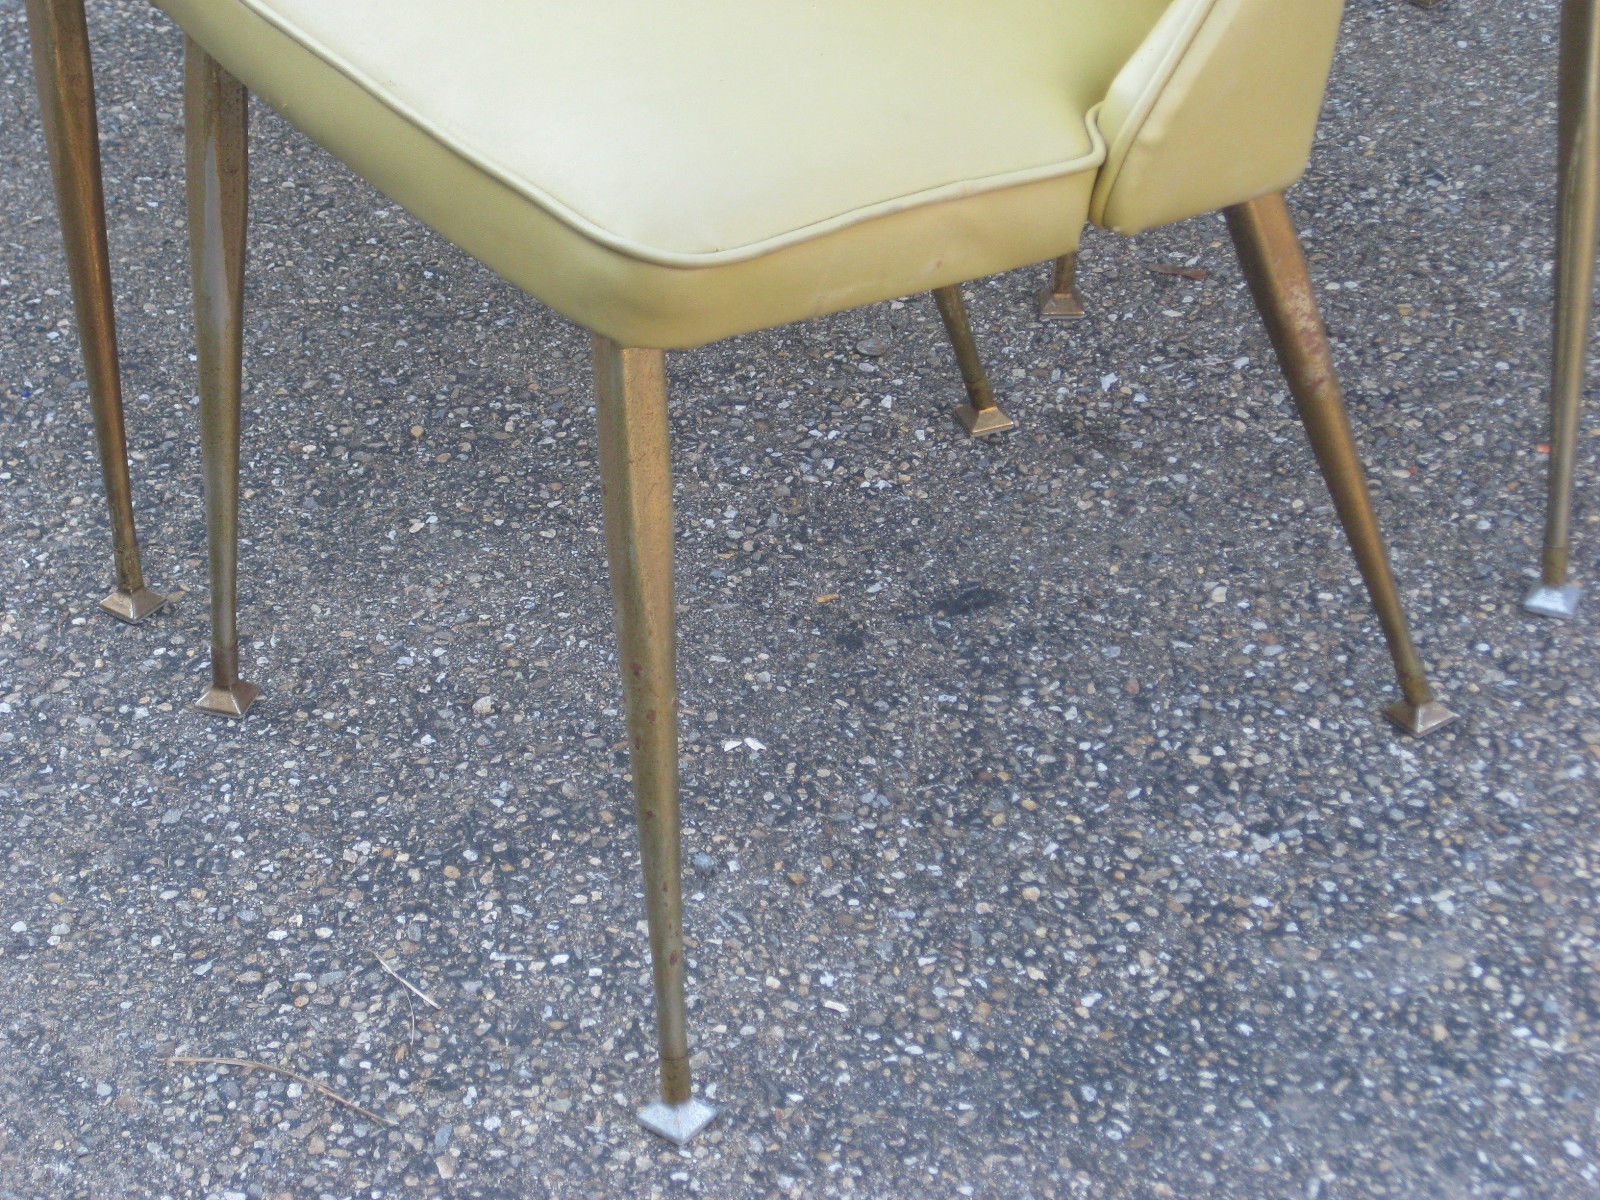
I got them all for $50/chair including delivery from NY.  Anyhoo, I found a great fabric and had the chairs reupholstered for about $125/chair.  So for about $175/chair, this is what we’re working with now:

Chair-After1 Chair-After2I know you can’t find mass produced upholstered chairs (non-Ikea) for less than $250/chair so I’m ecstatic that these are custom and exactly what I wanted.  What do you think?

I’ll take some pictures of the entire room this week.

I’d love to help you design a space that you love and truly represents you.  Please contact me if you are interested.  Follow me on FacebookTwitterPinterest, and Instagram (@joystreetdesign).

OCD Pantry

I have a thing for organization. I think everything should have a place and, ideally, always be in that place. This is a little tough to implement when you live in a half-finished house but every once in a while this need for organization kicks in and I go all OCD on a space.

Such is the case with our pantry. One day, I woke up to be greeted by ants in our pantry (lured by potatoes spoiling under a large bag of dog food…no finger pointing). After throwing everything away and spending way too much at the Container Store, I ended up with neatly arranged shelves AND was able to use my label maker. (Nerd alert :)).

20131112-092059.jpg

20131112-092123.jpg

20131112-092143.jpg

20131112-093320.jpg

I’m loving how everything is neat and tidy and how relatively easy it is to keep it that way.

The only thing missing was a place to create a shopping list. I previously used a magnetic notepad on the side of the refrigerator (as stainless steel appliance fronts are not magnetic) but our refrigerator is enclosed. And then I thought that maybe I would make the pantry door a chalkboard so that I can just write the list on there and take a picture of it with me to the store. But I nixed that idea because I have a chalkboard wall in my office and they are messy and full of dust which I don’t think works well in the kitchen.

Then I remembered seeing this idea and I knew it would be perfect. Five dollars and 15 mins later, I had this and I couldn’t be happier.

20131112-093043.jpg

And with that, I’m calling this room done and done. 🙂

Brass Tacks

A big trend for the last few years is the infusion of brass and gold accents back into home decor. We all remember the early days of shiny brass (likely in the houses we grew up in) and the influx of chrome and silver accents to make spaces look more modern. But now everywhere we turn great designers are using brass and gold accents in wonderful ways. (This seems to coincide with the lack of popularity of gold jewelry as well…and now it’s making a comeback too!)

20121016-214344.jpgKelly Wearstler

20121016-214848.jpgEmily Henderson has a self-professed love for brass.

20121016-215304.jpgLove this kitchen and hood.

In designing client spaces as well as my new home, I’m trying to balance the inclusion of lovely brass fixtures and accents while also ensuring that the space stays classic in the future. It’s a very delicate balance but I’ve decided not to use brass on any of the common everyday items/hardware and bring the brass in the lighting and other wow fixtures. So the door handles and hinges will be chrome but I’m hoping the handles on the kitchen cabinets will be brass. The reason I’m making this distinction is (arbitrary :)) partially due to replacement costs and personal tastes. It’ll be easy, cheap, and maybe even rewarding for someone to come in and make the kitchen look different with new cabinet knobs. On the other hand, door knobs/levers are boring, cost 10-15 times more than a kitchen cabinet handle, and will likely be the last thing that gets changed in the house.

I’m excited about the mix of metals and how they will interact in the house. I was able to do a little of this in the last bedroom I designed.

20121016-220441.jpgBedroom with brass lighting, dressed knobs, and curtain rod.

As the house comes together, I’ll reassess and determine if I need more of one metal to make the look work.

Are you experimenting with bringing in different metals in your home? Wearing more gold that silver or platinum?

Renovation Realities: Budget Schmudget

In the next tale of renovation realities, I thought it would be nice to discuss budget realities and how they truly affect the grand plans I had for the house.  As most dreamers, we started out with a fairly unrealistic budget that was slowly increased to account for the changes we wanted to make.  However, even after increasing the budget considerably (about 60%), we realized that we still weren’t going to get everything we wanted and we would be required to do some serious DIY (laying the hardwood floors, painting, etc.). The issue with this “realization” is that there are many things in this renovation that need to be done now and then there are things that make sense to do it the proper way now while we are in the midst of the ugly part of the renovation.  So there is only so much we can take out of the budget to make it work for us while doing a good job in getting the house ready for us to live.

Case in point: The house after 3 weeks of renovation and over $30K in costs:

If it’s not obvious, the house looks the f$#*ing same!  Yes, the house has a new HVAC system, new insulation, new windows, etc. and feels much better and has passed building codes but it’s still ugly.  And I’ve already spent a shit ton of money!  That’s crazy talk!

All that being said, I try to keep reminding myself that this is not our “forever” house and we don’t need to spend a ton of money to make changes that won’t truly impact the feel of the house.  It’s hard to remember this when I’m planning and dreaming but when I sit down to look at the budget I somehow don’t have a problem remembering :).  Here are some of the changes that we’ve made to the plan now that the budget has gone haywire:

  • We will no longer be taking down the wall between the kitchen and the family room.  It was going to costs almost $10K when all was said and done and it just didn’t add that much to the house.  We have a large wall opening between the two spaces and I’m not the biggest fan of a completely open kitchen anyway (I hate looking at the dirty dishes during a dinner party).  So I’ve reorganized the kitchen and can now focus on making the kitchen more functional and pretty.  (I’ll share updated plans soon.)
  • We’re not going to tear down all the walls in the master bedroom suite.  After doing the math, we would lose about 2′ in the bedroom just to gain a separate bathtub, shower, and toilet room.  While those things are important to me, due to configuration issues with the windows, etc., I didn’t love the floorplan and wasn’t terribly excited about the new bathroom.  So instead of spending another $5-7K to create just the shell of this bathroom that I wasn’t terribly excited about, I think it makes sense to keep the current floorplan and create an awesome shower (spending more on tile and other fancy features).  I’ll lose the bathtub but I could take a bath in the guest bathroom and call it a day (I’ve taken maybe 2 baths in the last 6 years :)).
  • The popcorn ceilings throughout the house are not actually popcorn and can’t be removed simply (or for the price initially quoted).  Lucky for me the ceilings are plaster and require several skim coats to make it smooth.  It’s going to take at least 2 weeks, cost twice and much, and totally mess up my schedule/budget.  The ceilings are something I’m unwilling to live with so we’ll be doing this no matter what.

On the bright side, today is the first day of real construction and things will start looking pretty.   I’ll snap some progress pics along the way.

P.S. Would love to hear from readers if they are enjoying these renovation realities posts.  Of course I think they are interesting but what the hell do I know :).

Obsess Much: Professional Packers and Movers

I’m in the middle of packing up our house for the move at the end of the month and I’m obsessing right now about professional packers and movers.  We’ve had the service in the past and it is amazing – they pack everything in your house, drive it to where it needs to be, and if you’re lucky (and pay for it) they will unpack a few boxes when you arrive at your new location.  Unfortunately, we can’t justify the expense in the middle of an overbudget renovation but a girl can dream.

The Ugly Truth: Wallpaper Removal Blows

I’m spending my Friday morning with a home inspector. Since there is nothing for me to do during this 1+ hour inspection, I decided to try to remove the wallpaper in the guest room.

20120928-094847.jpg
Not sure if you can tell but it’s textured wallpaper that has been painted. It was going to cost me between $500-1000 to have it removed or re-drywalled so I figured I’d go buy $25 worth of materials and give it a whirl.

15 minutes in:

20120928-095043.jpg

All hopes that it would peel off in full sheets are dashed. Still not sure what type of wallpaper it is.

30 minutes in:

20120928-095139.jpg

It’s coming off and definitely not one of the worst things I’ve ever done. I’ll keep pushing through until the inspector finishes and see how far I’ve come.

This much left to go:

20120928-095236.jpg

Wish me luck! Happy Friday!!

Happy Thoughts: Scenes from my weekend

Happy Monday! I hope you all had a great weekend. I had a relaxing and productive weekend all wrapped in one.

On the new home front, I received a sample door for my kitchen cabinets:

20120924-005816.jpg
I don’t think I like the “San Francisco” style and will likely go with a simple Shaker style but the construction on the door was great. I’ll likely order later this week (or early next week whenever demo is done and I can confirm the measurements).

The hubby and I also spent a few hours demolishing the cabinets in the garage.

20120924-010137.jpg
It wasn’t a major change but was needed to get other parts moving. I’m very excited about what is coming next.

Lastly, we spent Sunday evening with good friends from San Fran enjoying delicious fried chicken from Thomas Keller’s Ad Hoc restaurant (being served at Bouchon Beverly Hills).

20120924-010345.jpg
It was simply delicious along with the steak frites, mussels, and salmon tartare. (Sorry for the bad picture…we had devoured half of it before I remembered to take a picture.) We had a great time catching up and are always happy when friends come in town.

I love weekends like this where you are able to get things done but also relax with afternoon naps and enjoying time with friends and family. Well the weekend is over and I’m off to spend the day screaming at contractors because work on the house starts today!!!!

Here’s to a great week!

Custom Tie Storage

I thought it would be a good way to end the week with an easy DIY project (which never seems to be the case!). My hubby has to wear a suit (and tie) every day for work. Accordingly, our closets were overrun with ties and traditional hanging tie storage didn’t seem to make much sense.  So here’s what I came up with:

I didn’t take many pictures of the process the first time I did this project but I recreated the same drawer in our new apartment.  It’s a much smaller drawer so not as perfect but at least we have pics!

I started out by using these custom drawer dividers.

3 Inch High Kit-White Polystyrene Drawer Dividers

These were extremely easy to use but not terribly cheap.  I think I spent $60 on 3 of these packages.  However, I only needed two packages to complete both projects so I guess that isn’t too bad.

Anyway, the drawer dividers come with these sticky strips that allow you to create as many connections as you need.

You take these boards, score them and break apart to create the dividers that attach to each of the connectors.

So here’s the process:

1. Measure the width of the object (e.g. tie) and decide how wide the space between each row needs to be.  For the purpose of my project, I determined that 4″ would be the perfect size and would allow me to maximize the tiny drawer space.

2. Then you apply the connector strips on each side of the drawer.

3. Insert the divider in the connector strip to  make sure that your measurements were correct.

4. Then apply the connector strips spaced out thru the drawer.

5. Insert all the dividers.

6. Voila! Roll your ties, sort (sorta) by color, and you now have great tie storage.

This project was fairly simple and took less than an hour to complete.  But the best part is that my hubby actually uses it and rolls his ties back up at the end of the day.  No more ties on the back of chairs, the end of the bed, etc.  It’s the little things in life.

Pin this:

TV Shows Are False…Installing Hardwood Floors Is Hard Work (Duh!)

As we embark on the new home adventure, I thought it would be nice to spend the next few days (or so) showcasing a few of the projects that we completed in our previous home. By far, the biggest project at the San Francisco house was installing hardwood floors on the bottom level and stairs.

Here’s the background: We had great white oak floors on the main floor but a basic berber carpet on the remaining levels and stairs.  Our 80 lb. chocolate labrador retriever, Nala, evidently hated this carpet.  Her long straight hair didn’t like to come out of the carpet even with a Dyson vacuum.  If Nala ever got sick, she would wait until she was on the carpet to vomit.

Nala’s favorite spot on the stairs. Didn’t matter how many times we cleaned it…

Needless to say, it was time for a change.

We called a few hardwood installers to get quotes to remove the carpet and the quotes came in at approximately $13K!  We didn’t have that kind of money and I appeared to be the only person that was concerned about this need to change the floors.  After watching copious amounts of DIY or HGTV network shows, I believed that I could just install the hardwood floors myself.  Those damn liars!

With this encouragement, I actually purchased unfinished floors, rented a truck, picked up the floors and forced my hubby to carry them up two flights of stairs to our house.  It then took a few weeks to finally pull up the carpet, install the unfinished floors, rent a drum sander (and carry that up two flights of stairs) to sand the floors, stain and seal the floors.  I can’t remember how long it actually took but I’m almost positive we worked on the floors on the weekends for over two months (maybe 3 with a trip to Italy in the middle).

Unfinished Floors

In truth, installing the floors was not very difficult.  Once you get the first row down, it’s a fairly simple process and doesn’t take much skill.  The bigger problem is that it is BACK BREAKING work.  You’re on your hands and knees or bent over for hours on end.  And it’s a slow going process…you’re covering hundreds of square feet with 2.5″ slats and it just takes time.  We could barely stand up after the first day and each subsequent session didn’t make it any better.

Unfinished floors

It is a vast understatement to say that my hubby was not very happy with me.  Although he is frugal, I think he didn’t even care that we saved almost $8K.  I, on the other hand, was very proud of what we accomplished (even at the expense of our backs).  I think it looked fantabulous and we saved a ton.  I then took some of those savings to spend a day at the spa to recuperate. 🙂

Stained and sealed! Baseboards installed…All done!

The stairs were a completely separate project and took another month to complete but we’ll ignore that work for now 🙂

So don’t believe the hype…nothing takes 30 minutes to complete.  Funny enough, we’re now discussing if we should do the same thing for the new house or just pay someone to do it.  Glutton for punishment I tell ya!

Craftastic Vanity

I don’t consider myself to be especially crafty.  I’m very handy and love any kind of power tool but have never been interested in crafty endeavors like scrapbooking or things that require Mod Podge.  (I’m not sure if sewing would count as crafty…not that it matters because I also suck at that but I’ve been trying to learn more.)  Anyway, we had a good amount of space on the side of the bed and our nightstands were too small.  I had hoped to buy this vanity from West Elm for the space but it was actually (a stupid) 2″ too big for the space.

So I had the crazy idea to just revamp a Craigslist dresser into a similar vanity.  It started with this $50 dresser and then turned into this craft-like experiment.

I “simply” cut the top off, painted it, attached hinges, changed the knobs, découpaged the inside of the drawers, and added a mirror.

I thought this project would be super easy – a can of paint and a mirror – but due to other commitments, it took me almost six months to actually finish it.  If I wasn’t glutton for punishment, I would figure out that I seem to often underestimate how long a DIY project will take.  But instead, I’m always super excited.

Anyway, once the vanity was finished, we moved and didn’t need such a specific size nightstand.  To make matters even worse, I don’t need a vanity.  I don’t wear much makeup and can usually just apply it while in the bathroom like a normal person.  Kudos to me for wasting my time. 🙂  I think we will now be putting this on Craigslist to try to at least recoup some of the money.  Good times!!

Join me on FacebookTwitterPinterest, and Instagram (@joystreetdesign).